Development Environment
Develop Code
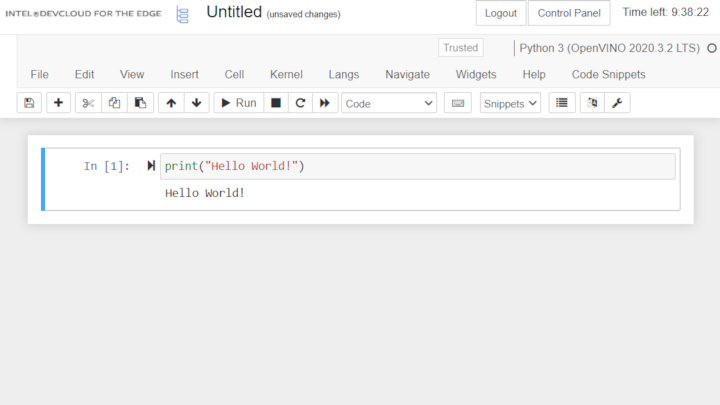
Intel® Developer Cloud for the Edge uses the JupyterHub* portal as its development environment. Access JupyterHub by opening one of our tutorials or sample applications. Or, create a new notebook to work with your own code.
Important If you modify any of the reference samples, tutorials, or workshop materials, you must save a copy of your work in the My-Notebooks folder: File → Save As, then specify the path as My-Notebooks/. If you forget to save, you risk losing all your changes during system updates.
JupyterHub opens to a File Explorer interface where you can navigate through directories and manage files.
Create a New Notebook
To create a new Jupyter* Notebook document, select New, then select one of the following:
- Python 3 (OpenVINO 2020.3 3.2 LTS) to create a notebook using the latest OpenVINO™ toolkit long-term support release
- Python 3 (OpenVINO 2021.3) to create a notebook that uses the latest OpenVINO toolkit release
Select the version of the OpenVINO toolkit that most closely matches your local development environment. This creates your new notebook. You can write new code or copy and paste from Sample Applications.

By default, the cells run your code on your development server.
For benchmarking, we recommend running your code on an edge compute node. To do this, select an edge node, and then reference it when you submit your compute job to the Intel® Developer Cloud for the Edge job queue. For more information, you can step through examples in any sample application or see Hardware for Edge Workloads.
Upload and Download Files
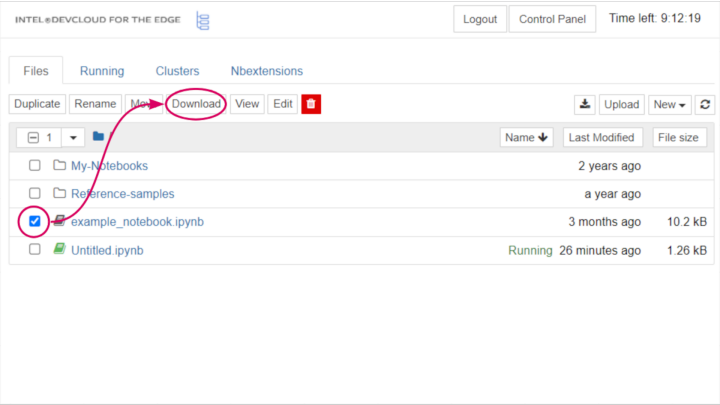
Select the logo in the top-left corner of the screen at any time to return to the file navigator, where you can move files between Intel® Developer Cloud for the Edge and your local computer.
To download a file from Intel® Developer Cloud for the Edge, select the checkbox next to the file name. Then, select the Download button that appears.
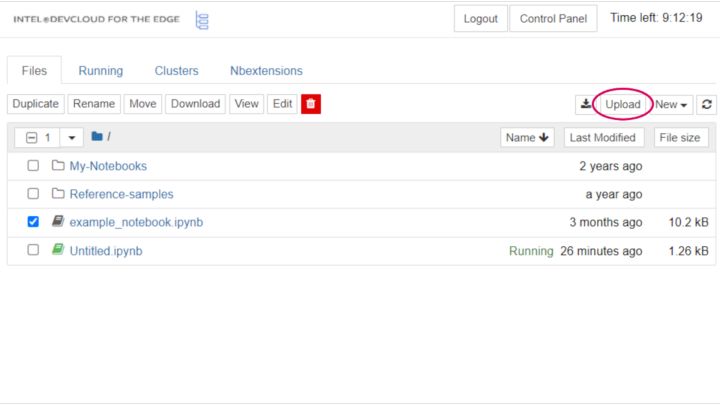
To upload a file to Intel® Developer Cloud for the Edge, select the Upload button located above the list of files:
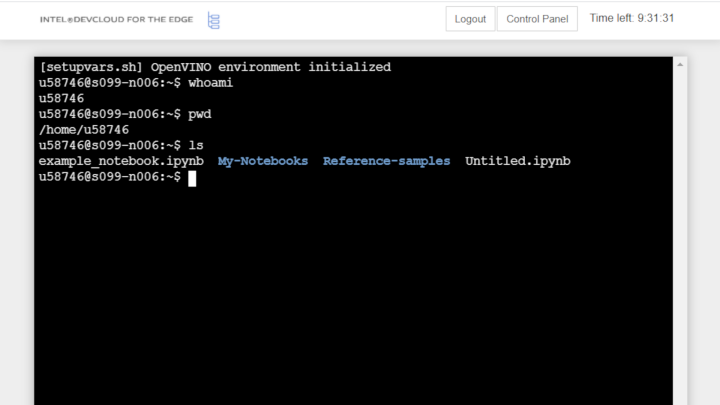
Launch a Linux* Terminal
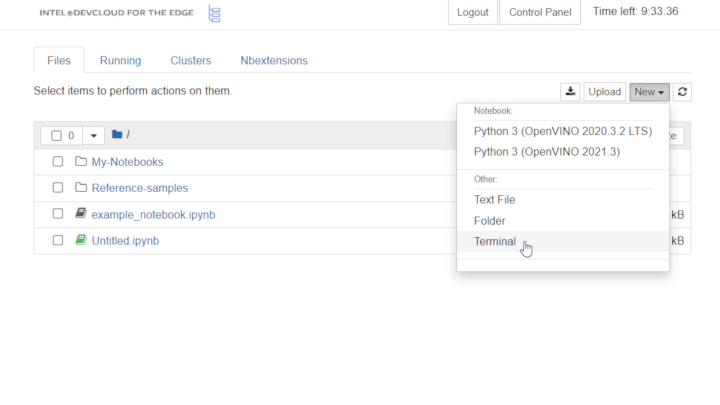
For more control over your development server, launch a Linux* terminal. To do this, select New and then Terminal:
You can interact with the development server, run editors like GNU Emacs or Vim, submit jobs to the Intel® Developer Cloud for the Edge queue, and perform various other tasks all from inside the terminal:
External Sources
If you need to obtain code or data from an external source, you can open a new Linux terminal and use one of the standard Linux tools, such as GNU Wget or Git. The following is how you might download a dataset from an HTTP server:
[u72779@c003-n222 $ | wget http://example.com/path/mydata.zip
The following is how you clone a repository from GitHub*:
[u72779@c003-n222 $ | git clone https://github.com/someuser/somerepo.git
Test Hardware for Edge Workloads
Test your workload with CPUs, GPUs, and accelerators to identify the architecture that best fits your needs on either Intel® Developer Cloud for the Edge development environment.
- Visit Hardware for Edge Workloads for lists of the nodes available in the JupyterLab* environment on Intel® Developer Cloud for the Edge.
- To target a specific hardware platform and configuration, see Ecosystem Partners.
Manage Workloads with Intel® Developer Cloud for the Edge
Learn about the different options for running your workload. Select a node or device and then learn how to use the job queue.
How to Run Your Workload
There are three options on which to run your workloads:
- Development nodes
- Edge compute nodes
- Compute devices
While it's possible to run code on your development node, these nodes have limited resources and only offer CPU architecture Usually, you run a job on an edge node, but you can also run your job on a specific type of compute device.
You will send your job to a node using the job queue. Read more at How to Use the Job Queue.
Development Nodes
When you first access the Jupyter* Notebook interface via Intel® Developer Cloud for the Edge, a server is created for you on one of its development nodes. A development node is a physical host based on an Intel® Xeon® Scalable processor. It provides one core of an Intel® Xeon® Gold processor and 6 GB of RAM for your work environment.
Development nodes are shared between multiple users. While users cannot see each other's processes or files, they still need to adhere to the Security Best Practices.
Edge Compute Nodes
To fully use the power of Intel® Developer Cloud for the Edge, run your code on an edge compute node. Edge compute nodes have more resources than development nodes and give you access to heterogeneous architecture including Intel® GPUs, VPUs (vision processing units), and FPGAs.
Edge compute nodes are industrial computing systems built and configured for machine learning inference at the edge. These nodes are intended for edge-computing purposes (such as deployment within close proximity to internet-enabled things). But, Intel hosts them in the Intel® Developer Cloud for the Edge so that you can experiment with various architectures and solutions using your own code or prebuilt samples. For more information, see Sample Applications.
Edge Node Groups
Intel® Developer Cloud for the Edge hosts are organized into groups, as shown in Table 1: Development Nodes for Bare Metal Workloads. All nodes within a group have an identical system configuration.
How to Use Edge Nodes
To send a job to a particular edge node or set of nodes, specify the Group ID (refer to this column in Table 1) using the -l argument of the qsub command.
How to Request an Edge Compute Node
To request this node with a particular compute device, submit a job requesting a node with the property listed in Queue Label (refer to this column in Table 1). For example:
qsub -l nodes=1:i5-6500te myscript.sh
This command does not guarantee the type of edge compute node, only that this system has (in this example) an Intel Core i5-6500TE processor. To be more specific about the type of system assigned to your job, request a property corresponding to your edge node group.
Compute Devices
You can run your job on a specific type of compute device by specifying the queue label for an individual type of CPU, graphics processor, or accelerator using the -l argument of the qsub tool. (For details, see Table 1: Development Nodes for Bare Metal Workloads.) This method expedites your job, possibly running it immediately. But, it can also have implications for your power consumption and performance metrics as your job can be run on an edge node in any group containing the type of CPU in your qsub request.
When you study the performance of edge computing solutions in the Intel® Developer Cloud for the Edge, you can target specific compute devices by:
- Requesting a node with that accelerator and
- Using the IEPlugin for the OpenVINO™ toolkit that corresponds to that compute device
However, an application targeting a particular compute device may perform differently in different edge node groups. This is because in heterogeneous systems with a CPU and accelerator, the performance of an inference application may depend on both components.
How to Use Compute Devices
To use a compute device from an application using the OpenVINO toolkit, initialize the IEPlugin object with the device argument of (CPU, GPU, FPGA, VPU). For example, in the Python* language, the line for initializing the plug-in may look like this:
from openvino.inference_engine import IEPlugin
plugin = IEPlugin(device="CPU")
How to Use the Job Queue
To run your code on an edge compute node:
- Select a node from the pool.
- Send your job to that node using the job queue.
Using this approach, your workloads run on edge nodes in a bare-metal environment with no virtualization layer between your code and the edge compute devices.
With the job queue you can:
- Access edge compute nodes with various configurations.
- Run several jobs on multiple nodes simultaneously, each with a different architecture.
- Run jobs with different arguments to scan a range of tuning parameters.
- Reserve an edge compute node for interactive work.
Your assigned edge compute node is exclusively yours for the duration of the job. The environment is cleaned automatically before and after each job.
See below for information on how to submit jobs, monitor jobs, and delete jobs.
[img]
Submit Jobs
To submit jobs to the queue:
Step 1: Create a Job Script
The Bash shell runs the job script. In addition to Bash commands, use PBS directives to inform the resource manager how to allocate resources for your job. Create a job script any way you want. For example, you can use a Jupyter* Notebook cell to write a job script like this:
%%writefile myjob
echo "
Hello World!
I am job ${PBS_JOBID}
I am running on edge compute node ${HOSTNAME}
My working directory is ${PWD}
Here is information about this node:"
/usr/local/bin/pbsnodes $HOSTNAME
echo "
And here is my Python version (Python writes output into stderr):"
python --version
livelog="${PBS_O_WORKDIR}/live-log.txt"
echo "
And now, I am going to play FizzBuzz from 1 to 100 in file ${livelog}..."
for i in `seq 1 100`; do
str=""
if [ $(( $i % 3)) -eq 0 ]; then str="Fizz"; fi
if [ $(( $i % 5)) -eq 0 ]; then str="${str}Buzz"; fi
if [[ -z "$str" ]]; then str=$i; fi
echo $str
sleep 1
done > ${livelog}
The string %%writefile invokes a "magic command." Running this cell creates a file in the current directory called myjob that contains everything that follows %%writefile.
Step 2: Run the qsub Command
After you create the job script, you can submit the job without leaving the Jupyter Notebook. This means that you can insert another code cell with code like this:
qsub -N testjob -l nodes=1:idc001skl myjob
What is happening here?
- Because this command begins with !, the system command line (not the Python kernel) runs it.
- qsub is the command-line tool used to submit scripts into the job queue.
- -N defines the name of the job that appears in the queue.
- -l nodes=1: defines the queue label for the edge compute node required for this job.
- myjob is the name of the file that runs on the designated edge compute node.
To learn more about selecting edge compute nodes, see Running Your Code.
Monitor Jobs
By default, once a job has been submitted you can no longer interact with it. However, if you want to know what is happening with your job, you have two options:
- You can query the job status and open a line of communication with your job.
- Upon job completion, a job report is written into files that you can view.
Query the Job Status
The command-line tool qsub can be used to query the status of your job. You can run qsub from a terminal or directly from the Jupyter* Notebook using the ! prefix:
!qstat
The output might look like this:
Job ID Name User Time Use S Queue

------------------------- ---------------- --------------- -------- - -----

35016.c003 ...ub-singleuser u58746 00:00:13 R jupyterhub

35029.c003 testjob u58746 0 R batch
We see two jobs:
- ...ub-singleuser (where the ellipsis stand for jupyterhub-singleuser), which runs your Jupyter* server on the development node.
- testjob used to run your test code on edge compute nodes.
Want more information about a job? Use the command qstat -f. For example:
!qstat -f 35029
In our case, running this command outputs the following:
Job Id: 35029.c003
Job_Name = testjob
Job_Owner = u58746@c003-n222
job_state = R
queue = batch
server = c003
Checkpoint = u
ctime = Fri Jul 19 09:59:17 2019
Error_Path = c003-n222:/home/u58746/queue-tests/testjob.e35029
exec_host = c003-n045/0
Hold_Types = n
Join_Path = n
Keep_Files = n
Mail_Points = n
mtime = Fri Jul 19 09:59:19 2019
Output_Path = c003-n222:/home/u58746/queue-tests/testjob.o35029
Priority = 0
qtime = Fri Jul 19 09:59:17 2019
Rerunable = True
Resource_List.nodect = 1
Resource_List.nodes = 1:idc001skl
Resource_List.walltime = 01:00:00
session_id = 1587
Variable_List = PBS_O_QUEUE=batch,PBS_O_HOME=/home/u58746,
PBS_O_LOGNAME=u58746,
PBS_O_PATH=/glob/intel-python/python3/bin/:/opt/intel/openvino_2019.1
.094/deployment_tools/model_optimizer:/glob/intel-python/python3/bin/:
/glob/intel-python/python2/bin/:/opt/intel/openvino_2019.1.094/deploym
ent_tools/model_optimizer:/glob/intel-python/python3/bin/:/glob/intel-python/python2/bin/:/usr/local/sbin:/usr/local/bin:/usr/sbin:/usr/bin:
/snap/bin:/home/u58746/.local/bin:/home/u58746/bin:/home/u58746/.local
/bin:/home/u58746/bin:/usr/local/bin:/bin,PBS_O_SHELL=/bin/bash,
PBS_O_LANG=en_US.UTF-8,
PBS_O_SUBMIT_FILTER=/usr/local/sbin/torque_submitfilter,
PBS_O_WORKDIR=/home/u58746/queue-tests,PBS_O_HOST=c003-n222,
PBS_O_SERVER=c003
euser = u58746
egroup = u58746
queue_type = E
etime = Fri Jul 19 09:59:17 2019
submit_args = -N testjob -l nodes=1:idc001skl myjob
start_time = Fri Jul 19 09:59:19 2019
Walltime.Remaining = 3579
start_count = 1
fault_tolerant = False
job_radix = 0
submit_host = c003-n222
You can also use the job ID to delete your job. See the Delete Jobs section.
View the Job Output
When the job completes (for this test job, it's about two minutes), its standard output and standard error streams are written into files that appear in the directory where you submitted the job. In our case, these files are named according to defaults testjob.o35059 (standard output) and testjob.e35059 (standard error). Here's what's inside:
Output of testjob.o35059:
########################################################################
# Date: Fri Jul 19 09:59:18 PDT 2019
# Job ID: 35029.c003
# User: u58746
# Resources: neednodes=1:idc001skl,nodes=1:idc001skl,walltime=01:00:00
########################################################################
[setupvars.sh] OpenVINO environment initialized
Hello World!
I am job 35029.c003
I am running on edge compute node c003-n045
My working directory is /home/u58746
Here is information about this node:
c003-n045
state = job-exclusive
power_state = Running
np = 1
properties = idc001skl,compnode,iei,tank-870,intel-core,i5
6500te,skylake,intel-hd-530,ram8gb,1gbe
ntype = cluster
jobs = 0/35029.c003
status = rectime=1563555526,macaddr=00:18:7d:be:11:bd,cpuclock=Fixed,varattr=,jobs=,state=free,netload=549653090555,gres=,loadave=0.11,ncpus=4,physmem=7850800kb,availmem=8430400kb,totmem=8850220kb,idletime=4989973,nusers=3,nsessions=14,sessions=1481 1997 2068 2103 2764 2765 2766 2767 2768 2769 2770 2814 2832 2947,uname=Linux c003-n045 4.15.0-43-generic #46~16.04.1-Ubuntu SMP Fri Dec 7 13:31:08 UTC 2018 x86_64,opsys=linux
mom_service_port = 15002
mom_manager_port = 15003
And here is my Python version (Python writes output into stderr):
And now, I am going to play FizzBuzz from 1 to 100 in file /home/u58746/queue-tests/live-log.txt...
########################################################################
# End of output for job 35029.c003
# Date: Fri Jul 19 10:01:05 PDT 2019
########################################################################
Output of testjob.e35059:
Python 2.7.12
These job output files won't appear in your home directory until the job has been completed. If, however, you would prefer to view the job's progress while it runs, use the live log method as described next.
Live Job Log
Our job script from before contained an expression to redirect its output to a file located in our home directory.
livelog="${PBS_O_WORKDIR}/live-log.txt"
...
for i in `seq 1 100`; do
str=""
if [ $(( $i % 3)) -eq 0 ]; then str="Fizz"; fi
if [ $(( $i % 5)) -eq 0 ]; then str="${str}Buzz"; fi
if [[ -z "$str" ]]; then str=$i; fi
echo $str
sleep 1
done > ${livelog}
According to the output in the previous subsection, the variable $livelog points to /home/u58746/queue-tests/live-log.txt. This file can be found in our home directory, which is shared across the Intel® Developer Cloud for the Edge network. Therefore, any changes or additions to the file made by the edge compute node also appears at the development node where they can be viewed. For example, while running the job, we ran the following command:
!tail live-log.txt
Running this command returned 10 lines of the FizzBuzz game at the point in the job where we executed the command:
Fizz
Buzz
11
Fizz
13
14
FizzBuzz
16
17
We use the same principle in the notebooks for sample applications, where the module demoUtils reads a progress file written by the job to display a graphical job progress indicator.
Delete Jobs
To delete a job from the queue you need to know its job ID, which you can get in one of two ways:
- By recording the return value of qsub, or
- By running qstat
Job ID Name User Time Use S Queue

------------------------- ---------------- --------------- -------- - -----

35016.c003 ...ub-singleuser u58746 00:00:13 R jupyterhub

35029.c003 testjob u58746 0 R batch
Once you have the job ID, you can delete the job using qdel: !qdel 35029
If the job was queued (as indicated by "Q" in column "S"), it is cancelled. If the job was already running (as indicated by "R" in column "S"), it is terminated with signal 9 and the job output is returned to the home directory.
Security Best Practices
Intel engaged Bishop Fox to conduct advanced level security assessments through API penetration testing, external penetration testing, internal penetration testing, and remediation testing by highly skilled penetration testers. Bishop Fox is the largest private professional services firm focused on offensive security testing.
Security Features
Intel Corporation and Colfax International, which hosts Intel® Developer Cloud for the Edge, follow industry best practices to protect the security of Intel® Developer Cloud for the Edge users and their uploaded data. The following security features have been enabled to protect Intel® Developer Cloud for the Edge users and their assets:
- All user data uploaded to the Intel® Developer Cloud for the Edge (for example, AI models, code, executables, or datasets) is protected from access by other users through standard Linux* privilege controls.
- Operating systems are hardened to prevent cross-tenant data access, meaning that:
- Users are blocked by default from seeing or listing other users' or system processes.
- No root access is granted under any circumstance.
- Access to edge compute nodes is provided to one user at a time.
- We constantly monitor all Intel® Developer Cloud for the Edge infrastructure for malicious activity, such as incoming and outgoing network connections, processes bypassing the queue, malware, and erroneous jobs.
- Any hard drives removed from the infrastructure are either wiped (if working) or physically destroyed (if not working).
- When a user account is terminated, whether through access period expiration or at the user's request, all data uploaded or created in the Intel® Developer Cloud for the Edge by that user is permanently deleted. It is not possible to retrieve any user data, for any reason, after an account has been terminated.
- Storage servers for user-uploaded data are maintained in a secure room with restricted key-based access to authorized personnel only.
- Whole disk encryption is enabled on the hard drives of the storage servers to prevent unauthorized access to user-uploaded data.
More Information
- User-uploaded data (code, executables, datasets, and more) is protected from access through standard Linux privilege controls. Designated Colfax staff may review this data for security enforcement and troubleshooting.
- User authentication is based on a six-digit code sent to a registered email. This code is required for each new device (browser or computer) logging into the Intel® Developer Cloud for the Edge portal. It expires after a period of time, and then requests a verification renewal.
- User-uploaded data is not backed up in any form. Users are responsible for maintaining their own data backups.
Best Practices
The computers and networks that make up the Intel® Developer Cloud for the Edge are shared with other users. Although default permissions and settings are configured for each user's security, each user must practice reasonable caution within this environment.
- Do not share your invitation email or access credentials with anyone.
- Do not set Linux permissions on your files or allow others to read them.
- Do not run servers that listen to network connections on a local port and grant access to your data.
- Do not store data in shared directories, such as /tmp, /var/tmp, or /dev/shm.
- After using a shared computer, delete browser cookies and your cache. Ensure that automatic login is disabled.